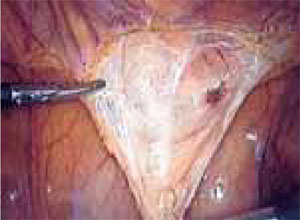
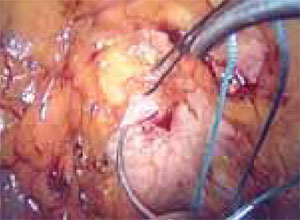
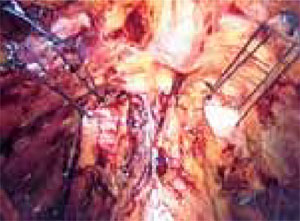
FIGURE 1

Pictured is the distended bladder, forceps (right) at the bladder margin, endoshears (left) at level of incision, and urachus.
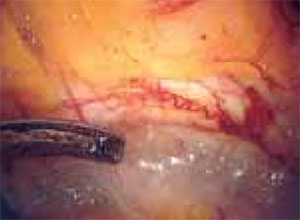
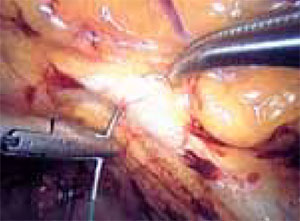
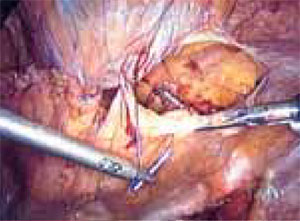
FIGURE 2
Create a transverse incision using monopolar scissors. Note the loose areolar tissue of prevesicle space.
FIGURE 3
Locate the pubic symphysis and ramus using the pelvic brim as a landmark.As the paravesical space is further developed, the pubocervical fascia will become exposed at the level of the UVJ. You must carefully protect the urethra, avoiding aggressive midline dissection as well as the obturator neurovascular bundle laterally. Medial traction on the bladder, perpendicular to the slope of the pubic ramus, encourages identification of the proper surgical plane. Use electrocautery to maintain meticulous hemostasis at all times. Identify Cooper’s ligament, and bluntly dissect away any obstructing fat or areolar tissue (FIGURE 4). To encourage scarification, gently remove excessive overlying periurethral and perivesical fat from pubocervical fascia at the level of the bladder neck, while avoiding any dissection within 1 cm lateral to the urethra ( FIGURE 5).
Placing the sutures. Using an extra-long (36-in), doubled-armed, nonabsorbable suture on an SH needle, place the sutures in the consistent sequence outlined below (note that sturdy needle drivers will facilitate secure needle placement):
First, introduce a needle from the contralateral port and pass it through the pubocervical fascia at the level of the midurethra, using your index finger for transvaginal guidance. If you think the tissue bite will not purchase nearly the entire thickness of the anterior vaginal wall, place a second helical throw (FIGURE 6). Next, bring the suture up through Cooper’s ligament and “store” it by hooking the anterior wall peritoneum (FIGURE 7). Bring up the second arm (needle) of the suture through Cooper’s ligament, but at a different depth than the first pass so ligament fibers are truly encircled by the suture (FIGURE 8). Retrieve both needles, bringing them out through the same port, but do not yet tie the suture.
Introduce the second suture through the ipsilateral port and place it in the same fashion at the level of the UVJ. Again, use helical throws as necessary. Once both sutures have been placed, tie them extracorporeally in sequence using a closed-loop knot pusher. (Waiting until both sutures are placed before tying allows exposure for easy placement of the second suture [FIGURE 9].) The appropriate tension should create a small, localized “knuckle” of pubocervical fascia that approximates laterally to the obturator internus fascia ( FIGURE 10).
Repeat this procedure in the same sequence on the opposite side of the pelvis ( FIGURE 11), then close the retropubic space using a running continuous 2-0 suture reapproximating the peritoneum (FIGURE 12). Close the laparoscopic ports at the fascia level using a Veress needle threaded with a 0-Vicryl. Both ends of the suture are passed on either side of the fascial incision. Using a contralateral grasping forceps, the suture end is freed from the Veress needle, then retrieved using an ipsilateral forceps. This port closure technique is easy to perform as well as cost-effective.
Postoperative care. Place a suprapubic catheter with a 2-way stop clock; this makes postoperative voiding trials easier for both patients and nursing staff.
Most patients will be discharged the day after surgery. If the patient still has an elevated postvoid residual, she’ll likely find going home with the suprapubic catheter more acceptable than intermittent self-catheterization or an indwelling Foley running to a leg bag. For postoperative discomfort, acetaminophen and nonsteroidal anti-inflammatory preparations are generally sufficient. Patients can resume normal living activities within days, but should be cautioned to delay strenuous work or exercise for at least 8 weeks.
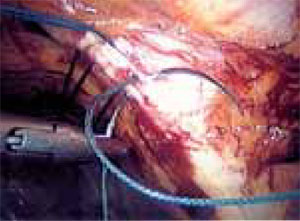
FIGURE 4
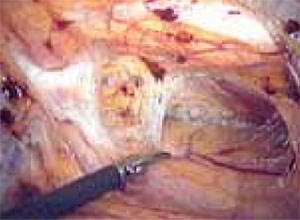
Apply medial traction to the bladder as the paravesical space is developed down to the level of pubocervical fascia. Note Cooper’s ligament, seen anteriorly.
FIGURE 5
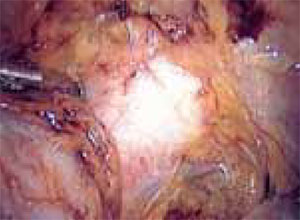
Gently remove the overlying periurethral and perivesical fat to expose white pubocervical fascia.
FIGURE 6
Apply counter traction on the suture from the first pass to facilitate better tissue purchase on the second pass of the helical suture.
FIGURE 7
Place the needle through Cooper’s ligament.
FIGURE 8
Pass the second needle at a deeper depth through Cooper’s ligament to encircle fibers within the suture. This will minimize the risk of “pull out.”
FIGURE 9
Place both sutures before extracorporeal tying.
FIGURE 10

Suture tension should create only a small knuckle of pubocervical fascia, approximating obturator fascia laterally.
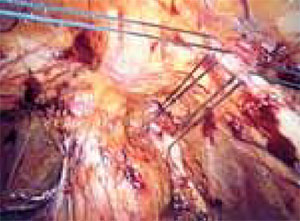
FIGURE 11
Both sides completed.
FIGURE 12
Close the retropubic space.