Clinical Review

2015 Update on vaginal hysterectomy
A few innovative tools can greatly ease the operative experience for both surgeon and patient

Consider this: You don’t need to enter the peritoneal cavity anteriorly in order to continue working on the procedure. You can safely protect the bladder throughout the case, until the very end, if necessary, in patients who have undergone multiple previous surgeries or cesarean deliveries.
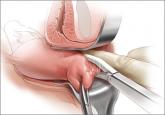
Rather than enter the anterior peritoneum, I dissect as much of the vaginal epithelium as possible and place a second Deaver retractor posteriorly.
I massage the uterosacral ligament for about 10 seconds to lengthen it and create more descensus, then place a Ballantine Heaney clamp on the ligament.
Next, I cut the pedicle and suture it, maintaining a clamp on the uterosacral ligament suture so that I can use it later for repair of the vaginal cuff.
I recommend a vessel-sealing device to secure the major blood supply, but I do suture the uterosacral and round ligaments for attachment to the apex at the conclusion of the hysterectomy. I suggest that you place straight clamps to hold the uterosacral ligament sutures and curved clamps on the round ligament ties to help you keep track of what you’re doing.
I generally prefer to use a smaller vessel-sealing device, such as the LigaSure Max (Covidien), because it allows me to take very small bites of tissue. It is also less expensive because it uses a disposable electrode within a reusable Heaney-type clamp.
Many people have argued that we need to teach surgeons to suture vaginally and, for that reason, should avoid vessel sealing. My response: Why wouldn’t we want to use the very best technology available? Randomized trials have demonstrated a 50% reduction in pain relief postoperatively when we use vessel sealing.4 Less foreign material is left in the pelvis, lowering the risk of infection. And it really doesn’t matter which vessel-sealing technology you use, as long as you’re familiar with the specifics of the system you choose. Another advantage: There is no need to pass needles back and forth.
Take small bites of tissue
Because this patient has a very small uterus, a small bite of tissue will get you close to where you want to be. When you take a bite with the vessel sealer, try to protect the vaginal epithelium and vulva from the steam that is emitted. The clamp itself does not heat up, but the steam that is released from the tissue is 100° C, so place a finger between the clamp and the sidewall for protection. It is preferable to burn your own finger than to burn the patient.
Because you haven’t entered the peritoneal cavity anteriorly, it is important to ensure that you don’t take too big of a bite with the vessel sealer. Rather, stay where you know you’ve done your dissection, where things are safe.
One cardinal principle of surgery is that you shouldn’t operate where you can’t feel or see. One of the common errors in vaginal surgery is that surgeons start dissecting higher than they can see. It’s easy to get into trouble when you start pushing tissue or dissecting tissue that you can’t visualize.
At this point, the anterior Deaver retractor is not essential, so I remove it. If you don’t need it, don’t use it. I try to avoid metal when I can.
If I were using suture rather than vessel sealing, I would place a Heaney clamp on the uterosacral ligament and cut. Using a clamp-cut-tie technique, I would pull on the pedicle and cut just beyond the tip of the clamp to ensure that the suture will be secure (FIGURE 4). This approach would not be appropriate during use of a vessel sealer. In that case, you would want to cut to but not beyond the tip of the clamp.
One of the skills helpful in suturing is learning to move your elbow and wrist to achieve the proper angle. Determine where you want the suture to exit the tissue, and then angle your elbow and wrist so that the suture comes out where you want it. It’s easy to lose track of the needle tip, especially when you’re working in a limited space under the pubic symphysis, so use your shoulder, elbow, and wrist to control suture placement.
Protect the anterior epithelium
Because you have not yet entered the peritoneal cavity anteriorly, it is important to protect the anterior epithelium and bladder. Reinsert a narrow Deaver retractor anteriorly, remove the Jacobs clamp, and replace the clamp laterally so that the cervix can be pulled off to the side (FIGURE 5).

A few innovative tools can greatly ease the operative experience for both surgeon and patient

Vaginal hysterectomy is a 21st Century approach, thanks to tools, techniques, and other refinements from the fields of laparoscopy and robotics

Sacrospinous hysteropexy and vaginal hysterectomy with uterosacral ligament suspension were found to be comparable at 12 months after surgery in...
