Dr. Biest is Assistant Professor, Department of Obstetrics and Gynecology, and Director, Division of Minimally Invasive Gynecology, Washington University School of Medicine in St Louis, Missouri.
Dr. Mutch is Ira C. and Judith Gall Professor of Obstetrics and Gynecology and Chief of Gynecologic Oncology at Washington University School of Medicine in St. Louis. He serves on the OBG Management Board of Editors.
The authors report no financial relationships relevant to this article.
Manual morcellation through a single incision. Mini-laparotomy or laparoendoscopic single-site surgery (LESS) incisions provide another option of removal with manual morcellation after laparoscopic hysterectomy or myomectomy. One study revealed that specimens up to 22 weeks in size can be placed in a large EndoCatch bag and morcellated extracorporeally by circumferentially coring with a scalpel.14
Contained power morcellation through a single port. Finally, the technique of contained EMM was recently described.15 This technique uses a large containment bag placed through a LESS incision with EMM being performed in an artificially created pneumoperitoneum. This technique isolates the specimen so that it can be morcellated without risk of exposing the patient to any malignant cells that might be unrecognized within the specimen.
Each of these techniques allows many patients to consider a minimally invasive option for their surgery. However, the ability to safely morcellate a very large uterus or myoma may be limited by visualization, and the experience of the surgeon is often critical in the successful performance of these procedures.16
Therefore, at Washington Universitywe have developed a technique using dual ports, with isolation of the uterus or myomas to improve visualization and prevent spillage of malignant tumor or dispersion of other benign tissue.
Dual-port EMM: Technique, tips, and tricks Our technique of dual-port contained EMM allows the removal of large fibroids or uteri much larger than 20 weeks in size safely under direct visualization through a 15-mm incision. The technique uses:
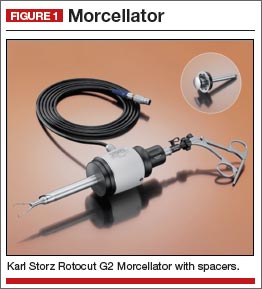
Karl Storz Rotocut tissue morcellator with spacers (FIGURE 1)
15-mm trocar
5-mm balloon trocar
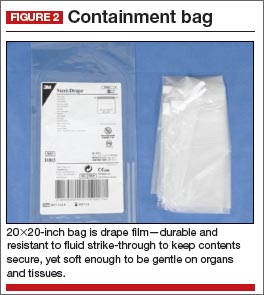
20320-inch containment bag (FIGURE 2).
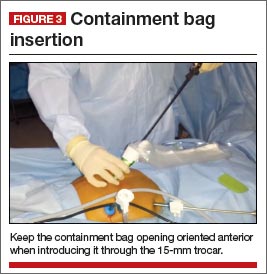
Containment bag placement Once the specimen is free, we place it to the right or left side of the abdomen. The 15-mm trocar is placed through the umbilicus while visualizing from a lateral trocar site. We then fan-fold the containment bag and introduce it through the 15-mm trocar, keeping the bag oriented with the opening anterior (FIGURE 3). The bag is then grasped at the opening along the drawstring with an atraumatic grasper.
Tip: Care must be taken when introducing the bag in order to avoid tearing or making a small hole in it.
The leading edge is then introduced into the deepest part of the pelvis, and the remainder of the bag (left outside of the abdomen) is then fed cephalad into the abdomen.
Once the bag is completely in the abdomen, we orient the bag with the opening as wide as possible. This allows placement of a very large specimen. Once the specimen is within the containment bag, the drawstring is pulled tight and the mouth of the bag is removed through the 15-mm trocar site at the umbilicus.
The abdominal lateral gas port is opened to allow the intra-abdominal pneumoperitoneum to escape. A 5-mm trocar is placed into the bag through the opening at the umbilicus and the containment bag is insufflated with carbon dioxide and the insufflation pressure is set to 30 mm. The laparoscope placed through this trocar allows the artificial pneumoperitoneum being created to be observed (VIDEO).
Vidyard Video
Tip: The containment bag covers the entire abdominal cavity and should be fully distended. If it does not distend fully, a hole in the bag may be present and the bag must be replaced.
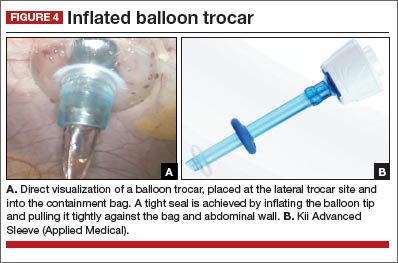
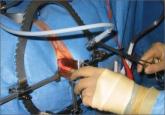
At this point, we place a balloon trocar at the lateral trocar site and into the bag under direct visualization. The balloon tip is inflated and pulled up tightly against the bag and abdominal wall (FIGURE 4). This allows a tight seal so there is no gas leak or spillage of the morcellated specimen. The laparoscope is placed through this trocar and the insufflation tubing is moved to this port.
Morcellator insertion The morcellator is introduced through the umbilicus under direct visualization using the short morcellator blade in most instances. Spacers are used to set the length of the morcellator within the containment bag. The tip of the morcellator should be approximately 3 cm to 4 cm within the bag but well away from the retroperitoneum. Remember, any bag will be cut easily by the morcellator and should be thought of as peritoneum only and not a tough barrier. Serious injuries could otherwise develop.
At this point, place the patient flat or out of Trendelenburg position. Morcellation may now proceed.
Tip: Morcellation is best performed with the morcellator perpendicular to the abdomen under direct visualization using a 30° laparoscope to optimize the view. Morcellation in this position uses gravity to facilitate “peeling” of the specimen during morcellation and allows for faster removal.
Before removing the morcellator, inspect the containment bag for any large pieces that may have been dispersed during the morcellation process and remove them. Once there are only small fragments remaining, remove the morcellator, allowing the carbon dioxide to escape. Deflate the balloon tip on the trocar.