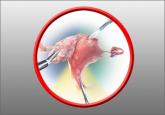
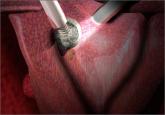
The abdominal approach to hysterectomy remains the most common route to hysterectomy in the United States. Its greatest advantage: It allows the uterus to be removed intact.1–3
The recent US Food and Drug Administration (FDA) warning against the use of power morcellation in women with known or suspected uterine malignancy has left many gynecologic surgeons wondering what might be the optimal approach to the removal of a large uterus.4
Although most hysterectomies are performed for benign conditions—namely, uterine fibroids—malignancy should be considered in the differential diagnosis. When hysterectomy is performed laparoscopically, a large uterus must be morcellated intraperitoneally. Since the FDA safety communication was issued, some hospitals have imposed a moratorium on the use of power morcellators for removal of uterine tissue until more definitive evidence is put forth regarding safety and best practices. This chain of events allows us an opportunity to review the basics of abdominal hysterectomy.
For the sake of this discussion, I will assume that the hysterectomy is being performed for a benign indication as I highlight the Mayo Clinic approach to total abdominal hysterectomy (TAH).5
The patient should be medically able to undergo operative intervention. If she has preexisting medical conditions, preoperative clearance should be obtained from her primary care provider, and her medical conditions should be optimized prior to surgical intervention.
Baseline laboratory studies include a complete blood count, electrolyte panel, glucose assessment, and an electrocardiogram (EKG). Bowel prep typically is not required. Provisions should be made to prevent deep venous thrombosis (DVT), usually by utilizing sequential compression devices, based on the individual patient’s risk factors.6,7
A prophylactic antibiotic to prevent surgical site infection (often a first-generation cephalosporin) should be given as a single intravenous (IV) dose prior to the incision.8 If bacterial vaginosis is present, treatment prior to surgery can reduce the frequency of vaginal cuff infection.9
Again, for the sake of this discussion, I will assume that malignancy has been ruled out.
After induction of anesthesia, position the patient either in a dorsal supine (traditional) or lithotomy (yellow-fin stirrups) position and reexamine her to confirm the findings of the pelvic exam. If the patient is positioned in the supine position, use ankle straps to prevent her from moving as the Trendelenburg position advances during the procedure.
Prep the abdominal skin with a bactericidal agent (most often a povidone-iodine solution). Also prep the vagina with a povidone-iodine solution because the vaginal cuff will be opened during the TAH. Place a transurethral catheter to drain urine throughout the case. Use of a three-way catheter allows the bladder to be easily backfilled during the procedure for identification of its borders or assessment of its integrity.
Last, incorporate a surgical pause prior to the incision to confirm that you have the right patient, know the procedure and incision planned, and are aware of any allergies. Also confirm that antibiotics have been given.
A planned approach avoids wasteful time and motion, and an adequate incision allows for sufficient exposure, which is critical but often underappreciated by the novice surgeon. We prefer a midline incision because it allows the most flexibility to adapt to intraoperative findings, but a Pfannenstiel incision also is an option.
Fixed retraction is paramount to “set up” exposure for the remainder of the case. We prefer a Balfour fixed retractor but, with smaller uteri, a self-retaining Alexis retractor (Applied Medical, Rancho Santa Margarita, California) affords decent exposure and may cause less postoperative abdominal wall discomfort; it also avoids the possibility of retractor-related neuropathy.
Moistened abdominal packing allows the bowel to be packed into the upper abdomen for the remainder of the case, which facilitates consistent exposure of the operative field. Adequate lighting is essential, as is one or more knowledgeable assistants.
Use sharp dissection throughout the procedure. Clean, sharp dissection averts injury to adjacent structures, such as the ureter, bladder, and rectum, and promotes recognition of any injuries, permitting immediate repair.
The application of proper traction and counter-traction on tissues allows accurate definition of the correct tissue planes and facilitates identification of important anatomic structures. Vital structures should be identified and, if necessary, mobilized before any clamps are placed or pedicles transected. Adhesions should be sharply lysed to facilitate exposure.
Freeing the bladder anteriorly and the rectum posteriorly prevents their inadvertent inclusion in closure of the vagina and minimizes the risk of fistula formation. The bladder and rectum should be sharply mobilized at least 1 cm beyond the site of planned vaginal transection.
Last, excellent support of the vaginal wall can be provided by securing the uterosacral-cardinal ligaments to the corners of the vaginal vault.
Identify the ureter |
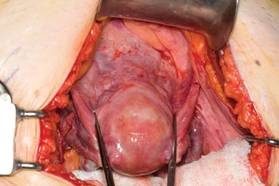
| FIGURE 1: Place straight Kocher clamps to facilitate traction during the operation. |
|
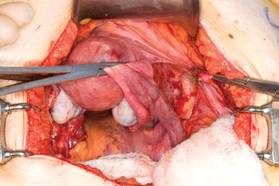
| FIGURE 2: Clamp and divide the right round ligament, opening the broad ligament. |
|
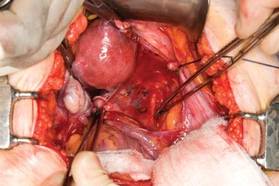
| FIGURE 3: Identify the right ureter along the medial leaf of the broad ligament. |
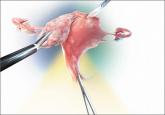
Once good exposure and adequate Trendelenburg position are achieved, place Kocher clamps across the cornual portion of the uterus (incorporating the round ligament, tube, and utero-ovarian pedicle) (FIGURE 1). This facilitates continuous traction and prevents back bleeding throughout the case.
With traction applied to the left, identify the right round ligament, clamp it with a Kocher clamp, and transect it. Incise the peritoneum parallel to the uterus and gonadal vessels (FIGURE 2). This opens the broad ligament and allows identification of the critical underlying structures (ureter, external and internal iliac vessels). Following the medial leaf of the broad ligament downward, identify the ureter by both visualization and palpation (FIGURE 3).
Although I do not discuss salpingo-oophorectomy in this article, be aware that the ureter is at risk when clamping the gonadal vessels near the pelvic brim.
Once the ureter is identified, create a window in the broad ligament above the ureter. In a medial to lateral fashion, place your index finger through that peritoneal window, making certain the ureter is below and out of the way. Place a Kocher clamp across the tube and utero-ovarian pedicle, and transect and suture-ligate the pedicle (preserving the tube and ovary). Repeat this procedure on the patient’s left side, using traction and counter-traction to facilitate exposure (FIGURE 4).
With the assistant providing upward traction on the uterus, use Russian forceps to elevate the peritoneum overlying the bladder. Undermine and incise the peritoneum from the patient’s left to the right (FIGURE 5). Begin sharp dissection of the loose areolar tissue. By gently spreading the tissue using the tips of the scissors, and snipping the tissue in the midline, you allow the dissection to proceed down the lower uterine segment (FIGURE 6).
Any bleeding usually means you are too close to the bladder or have ventured too far laterally. If the patient has had a previous cesarean delivery, this area may be densely scarred. Often, it is easiest to dissect laterally around the scar on each side, where there is less dense scarring, and mobilize the tissue until the denser central scarring can be dissected. Note that the bladder attachment curves upward on each side and lateral to the cervix, over the lateral vagina and the uterine vessels.
